Showing posts with label free motion quilting. Show all posts

Tuesday, January 14, 2014

Happy New Year 2014

Happy New Year everyone!  I hope your year has started of wonderfully.  Again, I have been busy sewing, just not writing.  First, a recap of some of my favorite projects from 2013.  The trend I noticed was lots of small projects.  There were no major quilts made aside from a couple of baby quilts.
2013 was definitely a year full of swaps.  I made so many items for other people and received lots of beautiful things in return.
My favorite was the X-Factor swap on Flickr.  I participated in every round because I just could not resist.  Each round I told myself I was sitting this one out and then I'd see the entries and had to participate.  My couch is so full of rainbowy goodness, it makes me happy every day to see so many lovelies from around the world.

2013 by cutsewpresslove
2013, a photo by cutsewpresslove on Flickr.
1. Les Amis baby quilt 2, 2. DSC_4065, 3. sewing summit secret swap, 4. DSC_3886, 5. Giant Dresden, 6. Double Hexy Delight, 7. PTS 10 finished, 8. DSC_4035, 9. DSC_2505 (2), 10. weekender side A, 11. Circle Celebration Pillow, 12. FLiQ complete, 13. AMHPP1, 14. Swirling Medallion Quilt, 15. Pickledish mini, 16. Simply Modern and Pezzy

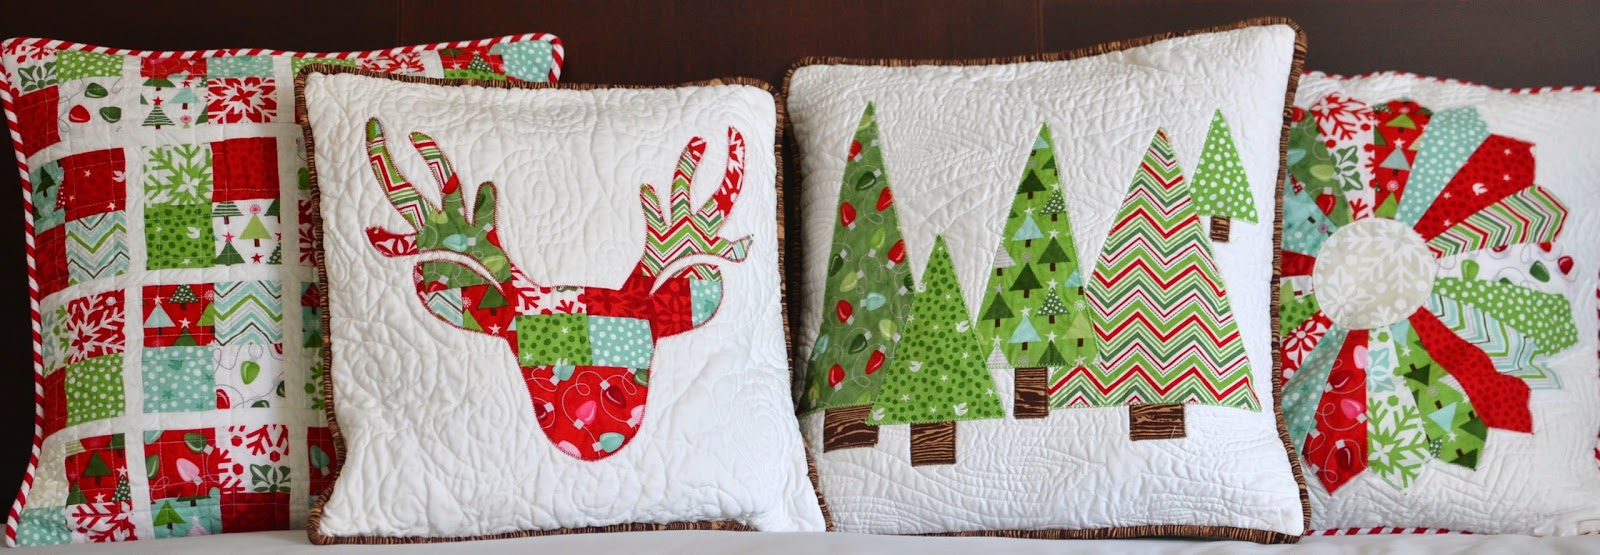
I made some Christmas pillows to sell in my Etsy shop.  Only one sold via Instagram thanks to the help of the wonderful Terri of Sew Fantastic.  I tried some new designs using raw edge applique and some different free motion quilting.
DSC_4003
Paisley quilting is my new favorite FMQ design.  Inspired of course by the ever amazing Angela Walters.  I always go to her books for inspiration.  Its nice to add a new skill to my repertoire.
DSC_4013

DSC_4022
DSC_4035
I also designed and made these wall art hoops.  There are still some left in the shop as well.
DSC_4051
DSC_4065
DSC_4060
This journal cover was created for  my quilting notebook.  Its way cuter than that ugly black and white camo print.  Sewing with real linen is not near as fun as using Essex linen.  It was so flimsy and shifty.  Still the result was a success so I am happy.  I used a tutorial from Stitched In ColorUntitled
A few of these ornaments were included into sold hoop orders as a thank you.
Untitled
Last, but not least is my first finish of 2014.  A belated Christmas gift for my mother.  I used leftover Anna Maria Horner scraps from when I made this pillow with a few solids mixed in.  I went with paisley quilting again because why not!  Seriously, after making this pillow I am now in the I LOVE AMH fan club.  I never understood the obsession some bloggers had with her fabrics but now I am a total convert.  The way her designs and colors work together is so amazing and beautiful, I cannot get enough.  This year I am planning to make a new queen sized spectrum quilt for our bedroom from her fabrics only.  I love my Swoon quilt but its time for a change.   I do dread the thought of quilting a queen sized quilt on my machine so we'll see how that goes.
AMHPP1
I have to note that when I make my patchwork pillows like this I do not sew each and every teeny square together one by one.  I use this cheater method from Oh Fransson.  I love it and highly recommend it.  Using the fusible makes this a quick and fun project.
AMHPP3
Well, now I think I am all caught up.  I won't even get into plans for this year.  Day by day is how I'm taking it.  Congratulations if you made it to the end of this pic heavy post ;)  As always, thank you so much for reading and for joining me on my sewing journey.  Again, Happy New Year friends!

Melissa

Friday, November 8, 2013

Hand Drawn Giant Dresden


So happy to finally be able to share this quilt!  I loved every minute I spent making this one.  Watching the magic that happens when Anna Maria Horner's fabrics play together is just so much fun.  All prints used were from her Hand Drawn Garden Collection.  I wavered back and forth about buying the entire collection for a while.   Something about it kept calling me back to my etsy favorite page, where I'd just look at the pictures of it until I finally hit the button.  This gorgeous room redo over at Olivia Jane Handcrafted totally sealed the deal as soon as I saw all of the beautiful photos.
Once the fabric arrived I stared at it not sure how to use all of the prints.  The giant Dresden idea hit me and I knew  this collection and that pattern would be a great combination.
I used Rita's tutorial over at Red Pepper Quilts for all of the cutting measurements.  For my ruler I used this OmniAngle Wedge Ruler I scored from Joanne's for 50% off. 
Giant Dresden

Untitled
Spray basted, straight line appliqued.

A Juliana Horner print from Joanne's was totally perfect as the backing.

DSC_3884

Concentric circles for the center flower and loopy quilting for the outer white area.
DSC_3843
 Scrappy binding, machine sewn.
DSC_3855DSC_3868
I also made this lovely lady to go along with the baby quilt which was a gift. 
Recently I've been obsessed with crocheting around around embroidery hoops thanks to these two awesome tutorials by Heart Made Life and Sew Chatty.  I wasn't sure what I was going to do with the hoops until I saw this gorgeous pillow by Ale and then I knew I had to make some beautiful hair silhouette girl.  Unfortunately the pattern she used had been retired and so I had to get creative.  I used some clip art I found and traced the lines I wanted to stand out.  I'm really happy with the way it turned out.
DSC_3886
And last but not least, here is my entry for the Low Volume round of the X-Factor Pillow swap. So fun to make this one, just really relaxing and easy so I named it Easy Breezy.
Easy Breezy
Thank you for stopping by to visit!  Happy sewing!
Melissa

Tuesday, June 25, 2013

Recent projects

Here is a look at some projects I've sewn up lately. 
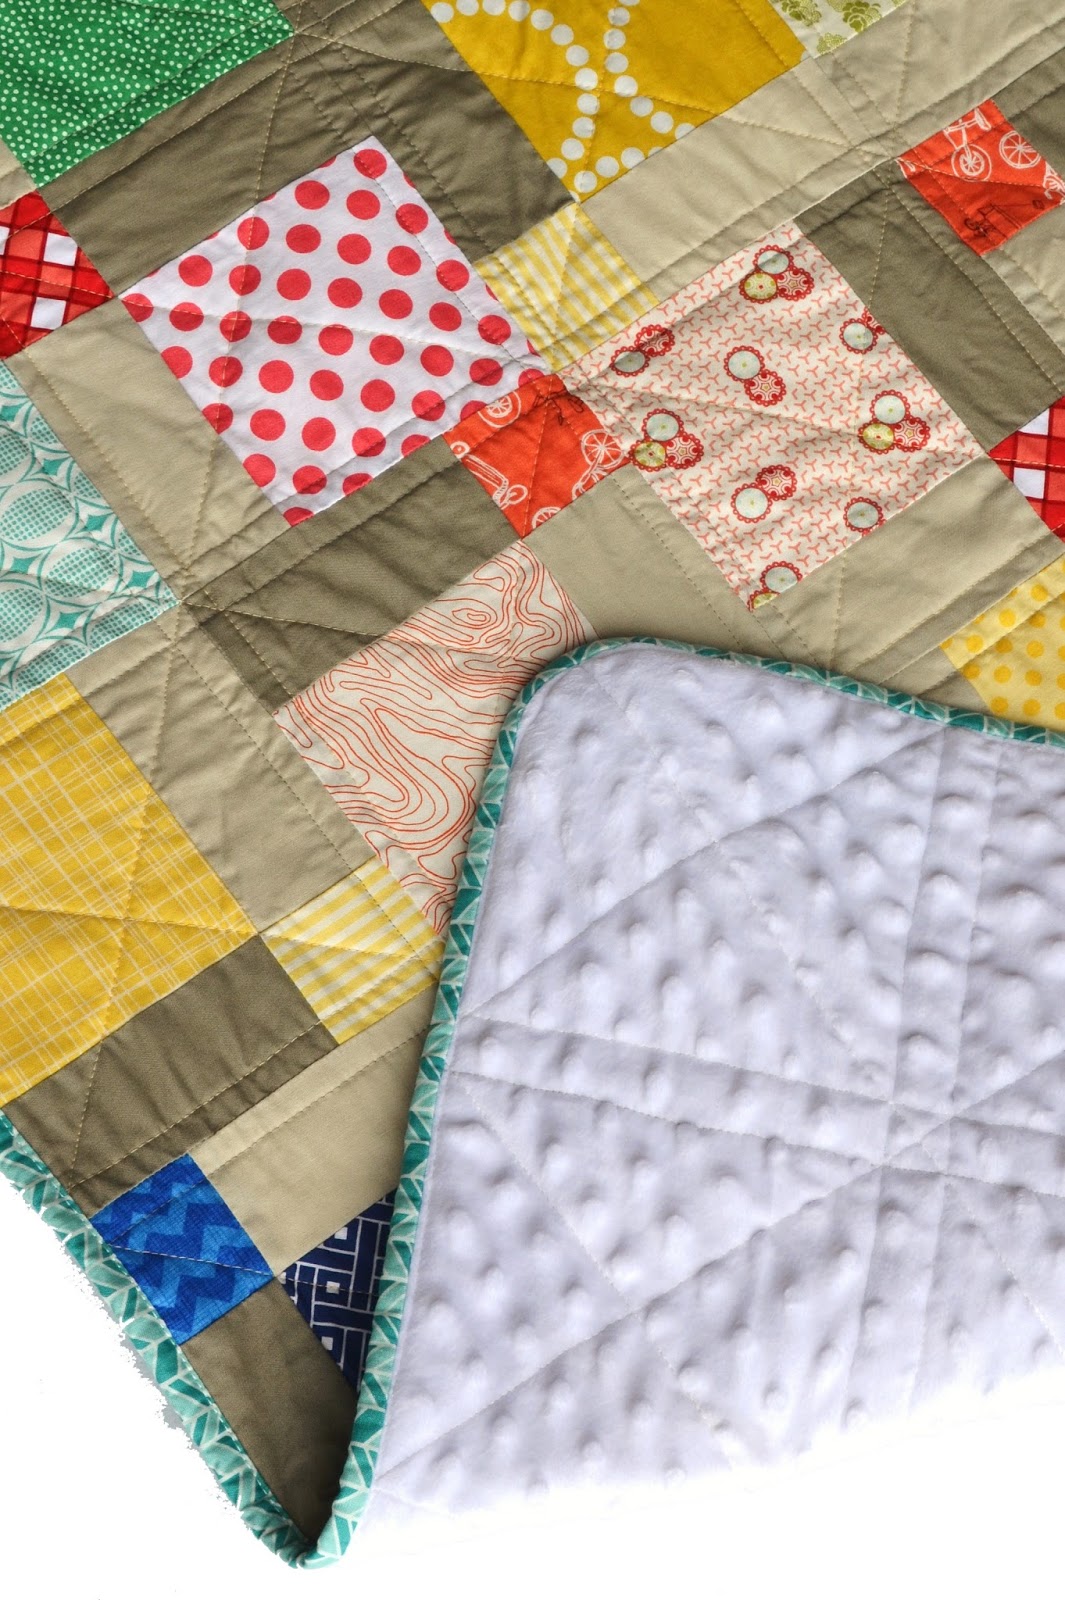
To start, a baby quilt for my new nephew.  I used a few solids from a Bella Solids 'Neutrals' bundle mixed with some high and low volume prints.  The pattern is a simple disappearing nine patch.  It finished at a nice crib size so it can be used for a toddler.
 I used minky for the backing.  It was pretty easy to quilt with.  Not as difficult as I expected it to be from what I read online.   I kept with simple straight line quilting.  I don't know if I would try fancy free motion with minky.
 Next, is another custom maternity gown.  I wasn't too sure of the fabric at first, but once the pink bow went on I loved the whole thing.  I used Spotted in the Crowd in Grace from Anna Maria Horner's Field Study line.
 I made this little pillow for my friend's daughter who turned two.  It was made from scraps I had left over from making her baby quilt before she was born.  I'm told she likes her pillow very much, which makes me smile.  I used Elizabeth Hartman's dogwood quilting tutorial
Again I used Svetlana's method for the back.  Just a few adjustments and I got the face to match up perfectly.  I love it!  This Tula Pink Parisville print kills me with how gorgeous it is.
 And that's about it for now.  It's been nice to have time behind the machine even though it means staying up until 2 sometimes 3 in the a.m.  I love the quiet time of the night.  Its great to relax even if I do pay for it in the morning.  Anyone else a night owl sewer? 
I leave you with a sneak peek of what I'm working on now.  It's so sweet and dreamy.

Thanks for reading!
Melissa

Thursday, April 25, 2013

FLiQ Mini

This mini was made for the Flickr Fab Little Quilt Swap.  My partner said she liked bright colors, especially red and turquoise together.  This design was totally inspired by The Elven Garden's Tesseract Mini.  It was so lovely I had to try the design for myself.  I referenced Don't Call Me Betsy's Kaleidoscope Quilt along for cutting and piecing directions. The triangles I used were smaller than her templates so I ended buying a kaleidoscope ruler from my LQS to help with precise cutting.
I FMQ'd the background areas and then used a template to trace the curves in the colored parts.  I quilted those areas with my regular sewing foot.
 
I like the flower shape in the middle and the corners.
  I worry it may be a little too bold because my partner kinda went silent on me.  Maybe she didn't like the direction I went, not her style?  I enjoyed making it.  It's a really fun block to put together.  I enjoy working with triangles.  That Architextures print makes for such a great background too. 
This mini finishes at 24" square.  I bound it in a some shade of Kona red.  I hope it makes her happy.  On to the next project :)
 
Melissa


Wednesday, January 30, 2013

Pickledish Mini

I am so excited to finally share with you the mini I made for a swap with Jessie of Inside The Paper Box.  Advance warning:  there are A LOT of pics in this post. 
I've been wanting to participate in some swaps on Flickr, but they all require prior swap experience and I had none.  I posted a message on instagram and Jessie so kindly volunteered to do a private swap with me to help build up my swappy street cred.  We posted inspiration collages and went from there.  I was so happy to see that one of her picks was Aneela's Pickledish block.  I've had this block bookmarked for a long time but never a reason or the time to actually make it.  And so here was my chance!  Jessie's only direction was that she liked scrappy. 
 
I have a very modest stash so everything I pulled was a favorite.
fabric selection
DSC_1353
The first few arcs were a bit tricky but then I got the hang of it.
DSC_1351
I included all of my favorite text prints for the cornerstones.
DSC_1354
Planning the layout.
DSC_1355
Pinning is crucial with these, but sewing the curves was no problem at all.  I found it very relaxing.
pinning the curves
Before I started any quilting, I sketched the block out and planned how I wanted each space to look.  My quilting was definitely inspired by Angela Walters.  I turned to both of her books and her Craftsy class for guidance.  I had planned to include swirls and circles in the background, but my skills aren't up to par yet.  I kept with the pebbles which was fun and not too difficult for my first time trying them.
quilt doodle
The only lines I actually marked were for the center quilting.
marking my quilting lines
At first I was having major tension issues and getting these weird knotty spots on the back.  Then I posted a pic on instagram asking for tips.  Within minutes I had some great suggestions and after a quick cleaning, needle change, and putting my feed dogs UP, it was smooth sailing!  I love instagram!
tension issues
DSC_1411
Pickledish mini
DSC_1425
Machine stitched binding.
pebbles
A view of the back.
backside view
I really had a great time making this mini.  I hope it is enjoyed in its new home.  Thanks to Jessie for the opportunity.  And thank you for reading!  :^)
Melissa

Linking up to Finish It Up Friday over at Crazy Mom Quilts.

Monday, November 26, 2012

Christmas Sewing


The pillow covers for my mother in law are done!  I really love them.  My goal was to make them modern but still have a  warm homey vibe to them.  I found a bunch of inspiration on flickr and went from there.
I pushed my quilting by attempting patterns in the book "Free Motion Quilting with Angela Walters."  This book is so beautiful to look at and definitely inspiring.  I was really proud of my wood grain quilting.  It was fun to try and gave a lovely result.  The attempt at concentric circles didn't leave me too happy at first, but after the cases were washed it looks a whole lot better.
Less than half a layer cake was used to make these.  I bought it from Pink Castle Fabrics via an instagram sale. I have enough left to make some more Christmas gifts.

DSC_1082
 
Dresden blades
DSC_0899
DSC_1075
DSC_1086

First time trying this wood grain technique.  I started with some marking lines to get the hang of it.  I also went in an up and down motion instead of side by side.  It felt easier to me that way.
DSC_0939
DSC_1074
DSC_1077

A reindeer in the making.  (November 2013 Here is an update on how I did it.) 
When I made it last year I was looking for the perfect deer head silhouette.
This is the link to the one I used
http://www.itsoverflowing.com/2012/10/no-sew-pillow-antler/

What I did was trace the shape on my computer screen,  outlined it in a black sharpie, and then enlarged it by copying and printing it at a larger size. Hope that helps :)
DSC_1067

It was not intentional to have him look like he had shades on but I think it makes him cooler.
DSC_1079
DSC_1087
DSC_1090

Fabrics Used:
layer cake of Joy by Kate Spain for Moda
Aviary Woodgrain by Joel Dewberry
Kona Snow
Michael Miller Clown Stripe in Red
Backing - Christmas collection fron Joanne's